一、安装
1. 下载源代码
https://gitee.com/tenant_clq/xxl-job.git
2. 数据库初始化
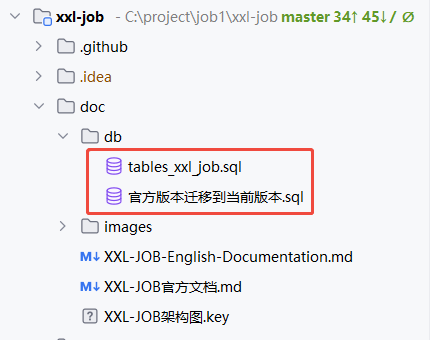
如上图,有2个数据库的初始化脚本:
(1)对于第一次安装,可以直接执行tables_xxl_job.sql脚本;
(2)对于已安装了xxl-job的,可以执行官方版本迁移到当前版本.sql脚本,增加相应的表、字段;
3. 修改配置并启动应用程序
(1)修改xxl-job-admin模块下面的application.yml文件的数据库配置;
(2)xxl-job-admin的XxlJobAdminApplication类的main方法启动;
二、关键配置说明
1. 项目的完整配置文件
### web
server.port=8080
server.servlet.context-path=/xxl-job-admin

### actuator
management.server.base-path=/actuator
management.health.mail.enabled=false

### resources
spring.mvc.servlet.load-on-startup=0
spring.mvc.static-path-pattern=/static/**
spring.web.resources.static-locations=classpath:/static/

### freemarker
spring.freemarker.templateLoaderPath=classpath:/templates/
spring.freemarker.suffix=.ftl
spring.freemarker.charset=UTF-8
spring.freemarker.request-context-attribute=request
spring.freemarker.settings.number_format=0.##########
spring.freemarker.settings.new_builtin_class_resolver=safer

### mybatis
mybatis-plus.mapper-locations=classpath:/mybatis-mapper/*Mapper.xml

### datasource-pool
spring.datasource.type=com.zaxxer.hikari.HikariDataSource
spring.datasource.hikari.minimum-idle=10
spring.datasource.hikari.maximum-pool-size=30
spring.datasource.hikari.auto-commit=true
spring.datasource.hikari.idle-timeout=30000
spring.datasource.hikari.pool-name=HikariCP
spring.datasource.hikari.max-lifetime=900000
spring.datasource.hikari.connection-timeout=10000
spring.datasource.hikari.connection-test-query=SELECT 1
spring.datasource.hikari.validation-timeout=1000

### xxl-job, datasource
spring.datasource.url=jdbc:mysql://127.0.0.1:3306/xxl_job?useUnicode=true&characterEncoding=UTF-8&autoReconnect=true&serverTimezone=Asia/Shanghai
spring.datasource.username=root
spring.datasource.password=root_pwd
spring.datasource.driver-class-name=com.mysql.cj.jdbc.Driver

### xxl-job, email
spring.mail.host=smtp.qq.com
spring.mail.port=25
spring.mail.username=xxx@qq.com
spring.mail.from=xxx@qq.com
spring.mail.password=xxx
spring.mail.properties.mail.smtp.auth=true
spring.mail.properties.mail.smtp.starttls.enable=true
spring.mail.properties.mail.smtp.starttls.required=true
spring.mail.properties.mail.smtp.socketFactory.class=javax.net.ssl.SSLSocketFactory

### xxl-job, access token
xxl.job.accessToken=default_token

### xxl-job, timeout
xxl.job.timeout=3

### xxl-job, i18n (default is zh_CN, and you can choose "zh_CN", "zh_TC" and "en")
xxl.job.i18n=zh_CN

## xxl-job, triggerpool max size
xxl.job.triggerpool.fast.max=200
xxl.job.triggerpool.slow.max=100

### xxl-job, log retention days
xxl.job.logretentiondays=30

xxl.job.executor.log-to-db=true

xxl.job.admin.machine.refresh.time=5
xxl.job.admin.machine.death.time=20


### tenant switch
xxl.job.tenant.switch.open=false
2. 多租户功能
(1)多租户默认是关闭,这时,实际使用的是admin租户
(2)admin租户的admin用户,拥有最高权限,能管理所有租户信息,修改各个租户的管理员密码
(3)开启多租户功能,xxl.job.tenant.switch.open=true
3. 执行器日志是否入xxl-job-admin数据库
默认会将执行器日志写入xxl-job-admin数据库,这样,当执行器日志丢失时,可以通过数据库查询日志。可以通过xxl.job.executor.log-to-db=false关闭这个配置
4. 全局预警功能
(1)对于邮件预警,邮件发送方的配置,与官方版本一样,配置在spring.mail下
(2)针对单个定时任务的邮件预期已失效,只有全局配置,对所有定时任务有效
(3)同时也支持企业微信、飞书、钉钉
5. 水平扩容
(1)后台有一个线程,检测xxl-job-admin实例是否存活,如果存活,则将定时任务分配给存活的实例,如果实例挂了,则将定时任务分配给其他存活的实例。由于每个定时任务,只分配给一个实例,所以在调度时不用加锁。解决官方版本在多实例下阻塞策略不生效的问题
(2)xxl-job-admin实例是否存活的判断逻辑,每个xxl-job-admin实例,定时更新xxl_job_admin_machine表的update_time字段,如果超过指定时间没更新,则认为实例已经宕机
# 多长时间,xxl-job-admin实例更新xxl_job_admin_machine表的update_time字段
xxl.job.admin.machine.refresh.time=5
# 多长时间,xxl_job_admin_machine表的update_time字段没更新,认为服务器宕机
xxl.job.admin.machine.death.time=20